
Refinishing your kitchen cabinets can dramatically transform the look of your kitchen without the expense of a full remodel. With a little patience and the right techniques, you can achieve a durable, factory-smooth finish that will impress.
Step 1: Preparation is Key
Proper preparation is the most critical step for a professional-looking finish.
- Empty and Remove: Start by emptying all cabinets and drawers. Then, remove all doors, drawer fronts, and hardware (hinges, pulls, knobs). Label everything as you go to ensure easy reassembly.
- Clean Thoroughly: Grease and grime are the enemies of a good finish. Use a degreaser (like TSP or a dedicated cabinet cleaner) to thoroughly clean all surfaces – inside and out – that you intend to paint. Rinse well with clean water and allow to dry completely.
- Scuff Sanding: Lightly scuff sand all surfaces with 180-220 grit sandpaper. This creates a surface for the primer to adhere to. You don’t need to remove all the old finish, just dull the sheen.
- Repair Imperfections: Fill any dents, dings, or holes with wood filler. Once dry, sand smooth.
- Dust Removal: Vacuum up all sanding dust, then wipe down all surfaces with a tack cloth or a damp microfiber cloth to ensure a dust-free environment.
Step 2: Priming for Success
Primer provides a uniform base for your paint and helps with adhesion and durability.
- Choose the Right Primer: For cabinets, an oil-based or shellac-based primer is highly recommended. These block stains, prevent tannin bleed-through, and offer excellent adhesion.
- Apply Thin Coats: Apply two thin, even coats of primer, allowing adequate drying time between coats according to the manufacturer’s instructions. Avoid thick coats, which can lead to drips and an uneven finish.
- Light Sanding (Optional): After the first coat of primer dries, you can lightly sand with 220-320 grit sandpaper to smooth out any grain raise or imperfections. Clean off dust with a tack cloth.
Step 3: Achieving the Factory Finish with Paint
This is where your efforts come to fruition!
- Select High-Quality Paint: For cabinets, a durable, high-quality acrylic-alkyd hybrid enamel or a dedicated cabinet paint is ideal. These paints offer excellent hardness, chip resistance, and a smooth finish. Available in various sheens, from satin to semi-gloss.
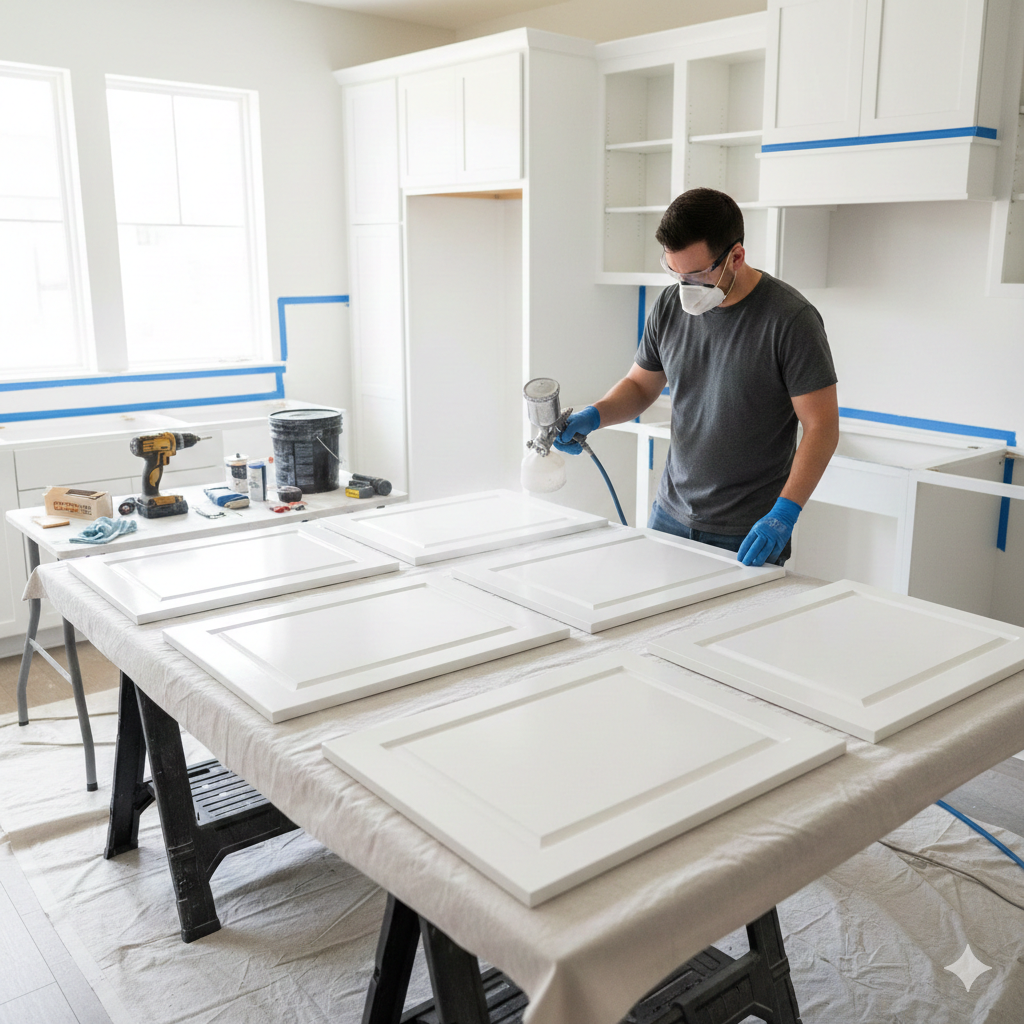
- Application Method:
- Spraying: For the smoothest, most professional finish, spraying is the preferred method. It eliminates brush strokes and provides an incredibly even coat. If you don’t own one, consider renting an HVLP (High Volume Low Pressure) sprayer.
- Brushing/Rolling: If spraying isn’t an option, use a high-quality synthetic brush (for detailed areas) and a fine-finish foam roller (for flat surfaces). Apply paint in thin, even coats, always working in the direction of the wood grain.
- Thin Coats are Crucial: Apply 2-3 thin coats of paint, allowing ample drying time between each coat. Rushing this step will lead to a less durable and less attractive finish.
- Light Sanding Between Coats: For an ultra-smooth finish, lightly sand with 320-400 grit sandpaper between paint coats. This removes any dust nibs or imperfections and helps with adhesion of subsequent coats. Clean thoroughly with a tack cloth after each sanding.
Step 4: Curing and Reassembly
Patience at this stage will ensure the longevity of your newly finished cabinets.
- Curing Time: While the paint may feel dry to the touch in a few hours, it takes several days, sometimes even weeks, for the paint to fully cure and reach its maximum hardness. Avoid heavy use during this period.
- Reassemble Carefully: Once fully cured, reattach all hardware and rehang your doors and drawer fronts. Be gentle during reassembly to avoid chipping your new finish.
With these steps, you can achieve a beautiful, durable, and factory-smooth finish on your kitchen cabinets, giving your kitchen a fresh, updated look you’ll love.
Leave a Reply